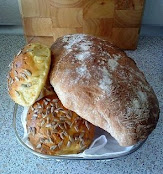
What a lovely way to spend a Sunday just baking, tidying up and doing a load of laundry or two... I spent the most time baking of couse and this is the result (I even learned to edit my photos as well and this is my first time trying to blur the background...)
Rhubarb cake and peppermint muffins with peppermint butter cream
Earlier this week my husband brought the leftover sweet rolls with honey and nuts to share at work and they really liked them so his colleagues came asking for more. Thursday evening I asked my husband to look through my muffin cook book and tell me what he wanted to bring and he pointed directly to the peppermint muffins. He is absolutely crazy about peppermint so that didn't surprise me. The hard part of making these muffins were getting hold of the peppermint extract which is required. I couldn't find it in the city so I just replaced it with After Eight chocolate and it worked like a charm! These muffins are really delicious if you like peppermint flavour so try them out.
Peppermint muffins with peppermint butter cream (makes 12 muffins)
Ingredients:
125 grams soft butter
125 grams sugar
2 eggs
125 grams all purpose flour
1 teaspoon baking powder
Peppermint extract (a few drops)
Green food colouring (a few drops)
100 grams chocolate chips
Peppermint butter cream:
175 grams soft butter
350 grams confectioner's sugar
3 tablespoons boiling water
Vanilla extract (a few drops or seeds from a whole vanilla pod )
Peppermint extract (a few drops)
Green food colouring (a few drops)
Decoration: chocolate sprinkles
Baking:
Preheat the oven to 190 C (375F). Get a bowl and whisk the butter and sugar in the bowl until it has a light and fluffy texture. Add the eggs, flour, baking powder, peppermint extract and the green food colouring and whisk until the mixture is smooth. Then stir in the chocolate chips and distribute the mixture into 12 muffin cases. Bake the muffins in the oven about 12-15 minutes until they have risen and are firm in the middle. Remove the cakes from the oven and let them off on a grid and get started on the butter cream.
Peppermint butter cream.
Whisk the butter in a bowl until it softens and then add the confectioner's sugar, the boiling water and vanilla. Whisk the mixture until it gets a light colouring and becomes smooth.The add peppermint extract and the green food colouring and whisk it all together. When the muffins have cooled off apply the butter cream on top and sprinkle with chocolate sprinkles...
I also succeeded in making a old-fashioned Danish rhubarb cake today with help from a delicious recipe I found on one of the blogs I read. We haven't sunk our teeth into this cake yet - I'm serving it for dessert tonight but it has been trying for us not to take a big bite out of it already... I'll share this recipe with you in English and link to the original recipe in Danish at the end of this post.
Old-fashioned rhubarb cake with meringue
Ingredients:
175 grams butter
100 grams sugar
2 tablespoons vanilla
1 pinch of salt
3 egg yolks
250 grams all purpose flour
2½ teaspoons baking powder
6 tablespoons milk
Rhubarb meringue:
3 egg whites
200 grams sugar
100 grams chopped hazelnuts
600 grams rhubarb
Dough:
Melt the butter and mix it with sugar, vanilla and salt. Add the egg yolks. Mix flour and baking powder and alternating sift it into the bowl with the milk.
Rhubarb meringue:
Wash the rhubarb and cut it into little pieces of 2 cm each. Put them on a kitchen towel to dry off. Whisk the egg whites stiff and gradually mix in the sugar which makes the meringue tough. Carefully fold in the chopped nuts and the rhubarb.
Pour the dough into a tin and spread out the rhubarb meringue on top of it. Bake the cake at 175C (325-350F) for about an hour. Keep an eye on the cake and make sure that the meringue doesn't get burned. Cover the cake with tinfoil when it has darkened enough for your taste.
Bon appetit...